Escape From Tarkov Beginner's Guide
If you're new to Battlestate Games' hardcore extraction shooter, then there's few better things that you can do than reading this Escape From Tarkov beginner's guide to learn the ropes.
This is part of the ‘Escape From Tarkov’ directory
Directory contents
-
Anesthesia
-
Beyond the Red Meat Part 1
-
BP Depot
-
Burning Rubber
-
Checking
-
Chemical Part 1
-
Classified Technologies
-
Corporate Secrets
-
Delivery from the Past
-
Drug Trafficking
-
Energy Crisis
-
The Extortionist
-
First in Line
-
Grenadier
-
Gunsmith Part 2
-
Gunsmith Part 3
-
Gunsmith Part 9
-
Gunsmith Special Order
-
Hot Delivery
-
Introduction
-
Letters
-
Luxurious Life
-
Out of Curiosity
-
Pharmacist
-
Rough Tarkov
-
Saving the Mole
-
Search Mission
-
Seaside Vacation
-
Shooting Cans
-
Shortage
-
Stray Dogs
-
The Walls Have Eyes
-
What's on the Flash Drive
-
Exit Here
An Escape From Tarkov beginner's guide could easily fill an entire book, but any player who has jumped into the ever-growing extraction shooter knows how important a guiding hand is. Very few multiplayer games are as initially alienating as Escape From Tarkov, with complex systems layered upon vague quests that would take you an age to figure out if you tried to tackle it on your own.
However, with this Escape From Tarkov beginner's guide you'll be taking on the Norvinsk region with confidence in no time, racking up PMC dog tags and climbing the levels with ease.
What To Do When You First Boot Up the Game

Loading up Escape From Tarkov for the first time can be a bit of a disorienting experience, as you will be greeted by a number of different choices that perhaps might seem to be more important than they actually are.
BEAR or USEC?
The first question you might be asking yourself is whether to choose the BEAR or USEC faction. To put it simply, the main difference between the two factions is that BEAR PMCs are Russian and USECs are American. While there is a BEAR voice selection that is in broken English, this choice chiefly determines the language that your voice lines are spoken in.
Beyond this, the only current additional difference is when you're playing on the Lighthouse map. If you're a USEC PMC then the tough AI Rogues will only shoot you if you get very close to them and don't follow their commands, whereas they will shoot on sight if you're a BEAR. There will likely be additional differences in the future when the game reaches its full release but at this current time that's all there is for you to worry about.
Escape From Tarkov Main Menu Explained
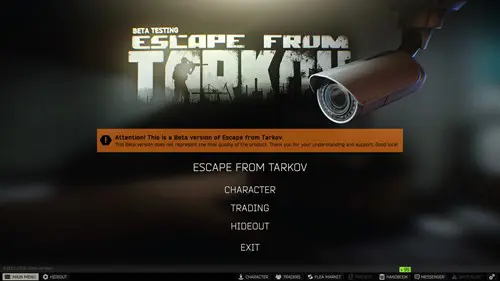
While it might seem very silly to be explaining a main menu, the central hub of Escape From Tarkov does have quite a lot that you'll want to quickly get your head around before you actually start playing. While it does frustrate some parts of the fanbase, the truth is that you will spend a fair chunk of time outside of raids, so you better get familiar with it.
Character Tab
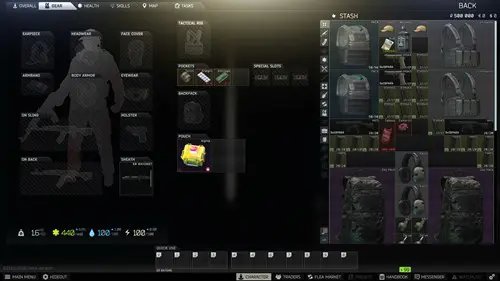
Heading to the Character tab, you will be able to see your stash, overall stats, current loadout, PMC health, skill progression, any maps that you have obtained, and all of your currently active tasks.
Your stash is where everything that you have obtained from your raids and the Escape From Tarkov Traders is stored, with each item taking up its own specific amount of cells. Armour, bags, rigs, and guns all predictably take up a fair amount of space, whereas meds, magazines, and ammo are usually one to two cells each.
In order to equip something from your stash, all you need to do is drag it over to the corresponding slot (often indicated by a green outline), or you can instead hold the ALT key and click on the item of choice to send it straight to your loadout.
The Pouch (more commonly referred to as the Secure Container) is a small box that prevents any items inside of it from being lost upon death. This can be incredibly helpful if you find a high-value item or something you need from a barter, but do bear in mind that items preserved after death through the container still lose their Found in Raid status.
Clicking on the Health tab within the Character screen will allow you to see your current PMC health split into seven different sections: Head, Thorax, both Arms, Stomach, and both Legs. We will break down what each of these mean in more detail later in the combat section, but the main use of this specific screen is to heal your PMC, as any damage you take will persist after each raid.
Traders Tab
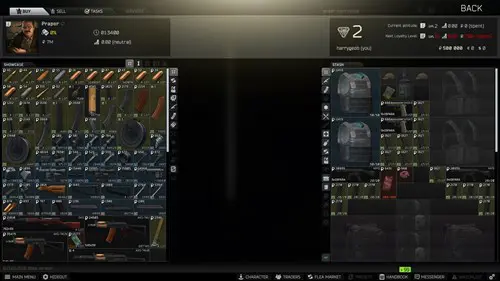
The Tasks tab is directly linked to the Traders, which is probably the section of the menu that you will spend the second most time in - superseded only by your inventory. While the primary function of the Traders is for you to buy and sell items, they also give you tasks, which is your main way of levelling up and gaining access to new items.
Tasks in Escape From Tarkov are not automatically claimed though, so you will need to head to the 'Tasks' section of each individual Trader to take on and complete any quests that they have for you.
Quests are unlocked in a chronological manner, meaning that you will often only gain access to new quests by completing the ones you already have, so it is really important to focus on getting all of your tasks done as soon as possible.

The main reward for completing tasks outside of XP is trader's reputation. If you look in the top right of each Trader's screen, you will see a box that displays your current attitude and what you need to reach the next Loyalty Level. The number next to the rising arrow indicates your current reputation with each Trader, and that will rise when you complete quests that they have given you.
Each Trader has four Loyalty Levels (often shortened to LL1/LL2 and so on), which give you access to a plethora of new items to sell, and often new quests too. The majority of the best guns, armour, and ammo in the game is locked behind the higher Loyalty Levels, so working your way up to them is well worth it in the long run.
In terms of actually purchasing items from the Traders, you will have two different methods and three different currencies. Going over the methods first, you can buy items either through a direct cash purchase or through a barter for other lootable items. You can trade seven knives for a UMP with Peacekeeper for example, giving you an alternate means of getting certain items that you might not be able to purchase otherwise.
In terms of currency, you will mainly be trading in Roubles, but there are also US Dollars and Euros too. USD is used exclusively with Peacekeeper, and Euros are used for some high-level items at the top Loyalty Levels. You can use Roubles in exchange for these currencies at any point though, so it is best to only purchase them when you need to at the start.
How to Mod Weapons in Escape From Tarkov
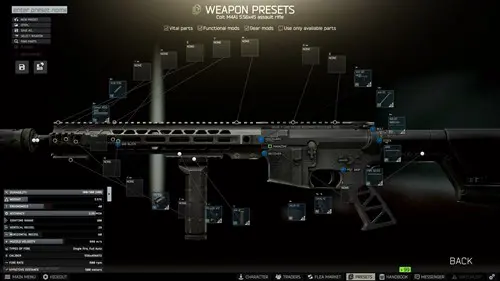
Linked closely to the Traders is the process of modding your weapons, which is often the most confusing thing for new players to the game. Why aren't attachments working for my gun? What do all of these parts do? And how on earth do I put a sight on my gun? While the whole modding process gets significantly easier once you unlock the workbench in the hideout, there is a fair amount that you can do before that.
Your best friend in these instances is the 'Linked Search' feature. Right-clicking on any weapon or weapon part and selecting linked search will show you a full list of the attachments that are compatible with the original. For example, in order to see which muzzle attachments you can use on your gun you will often need to do a linked search on the barrel, as that is the part that it is connected to.
Continuing this line of thought, auxiliary attachments like sights, foregrips, and tactical devices will always need some form of rail to attach to. Sometimes these rails are built into the dust cover or handguard but you might need to change some things around to make it work.
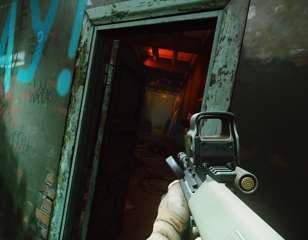
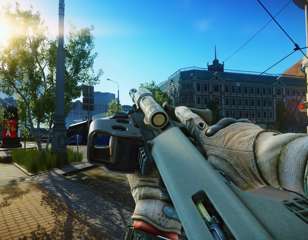
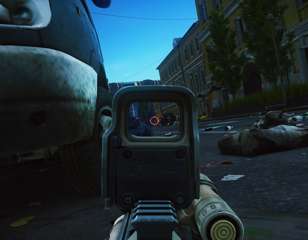
A great example of this is getting a sight on the M4, which is one of the starting USEC guns and thus a popular early choice. The stock gun has no means to attach a sight, but you can remove the rear sight carry handle to have access to the rail it was sitting upon. However, even though you can now attach a sight, any vision through it will be obstructed by the gas block/front sight combo.
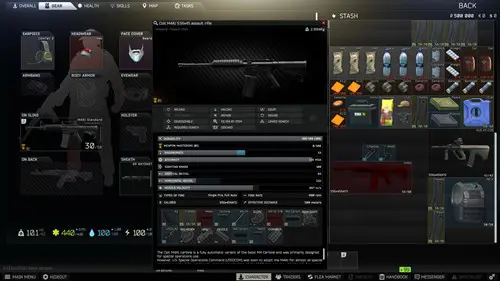
Now you might think it is just a case of removing that piece also, but then the gun is classed as dysfunctional. So, you will need to get your hands on a low-profile gas block - the earliest of which is the AR-15 Winham Weaponry Rail Gas Block which can be purchased from Mechanic after completing his Gunsmith Part 1 quest.
While that is a rather extreme case and might deter you from ever trying to tinker with your weapons, it displays the flexibility and adaptability of Tarkov's weapon modding system. It takes a while to get fully into the rhythm of it, and you will need access to the later Loyalty Levels in order to properly see the breadth of attachments, but you can really transform your weapons into what you want.
The other main concept to consider when modding your weapons outside of pure functionality is recoil and ergonomics. Each weapon attachment has its own recoil and ergo stats which either lower or raise the effectiveness of your gun.
Ergonomics chiefly defines your ADS speed and has a small effect on the length of time you can stay scoped and recoil determines the kick of your gun when firing. You'll want your ergonomics to be as high as possible and recoil as low as possible, but you can make certain sacrifices. Suppressors for example give a significant ergonomics decrease, but many players argue that the benefits of silence far outweigh the downsides of a slower weapon.
What are the Best Beginner Maps in Escape From Tarkov?
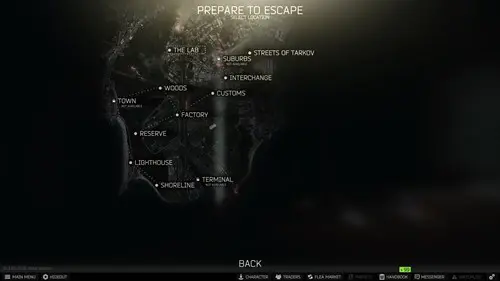
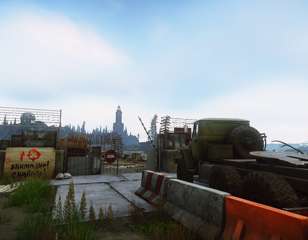
While any map in Escape From Tarkov is going to take a while to learn, some are better than others from a beginner's perspective. Customs is the most commonly suggested map for beginners, as it houses a fair amount of early-game tasks and is not too hard to learn. However, it is a PvP hotspot for the entirety of the wipe, so you could get yourself in a bit of trouble against players who have far better gear than you.
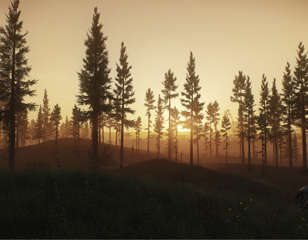
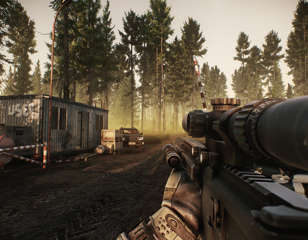
Woods is alternatively a really good choice for beginners wanting to ease themselves in. Not only is it harder to run into other players - so you can ease yourself into the game a bit better - but it also has a lot of great loot that is left relatively untouched. It is a harder map to learn for beginners though, as its sheer size combined with the fact it is - as the name suggests - mostly just trees can make navigation quite tricky.
The main thing you'll want to be confident with when you're trying out a new map though is that you know where the extracts are. Since there are no real-time maps in Escape From Tarkov for you to use, knowing how to navigate yourself through distinct landmarks is a must as otherwise you can get lost very quickly.
Using websites like MapGenie can go a really long way in helping you figure out where everything is, and until you properly learn each map it is very much recommended that you keep one up on a second screen if possible when playing.
Escape From Tarkov Beginner Combat Tips
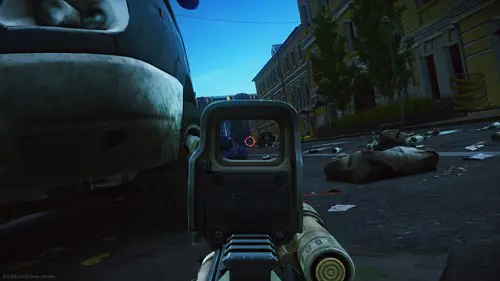
While we could very easily do a whole separate guide for beginner combat tips in Escape From Tarkov, there are some fundamentals that are essential to know before playing.
First of all is understanding damage values and penetration. We go into far more detail in this Escape From Tarkov penetration guide, but the short of it is that your bullets do damage, not the weapons. Choosing the right ammo is far more important than having the right weapon, as the same gun could take between three and twenty hits to kill depending on the ammo.
The main reason for this is each bullet's penetration value, which determines how effective it is at piercing the different classes of armour. There are six armour classes that become increasingly more difficult to get through, so if you think you hit someone loads but somehow didn't kill them, the chances are that your penetration wasn't high enough.
Moreover, each of the aforementioned sections of your health have their own HP. If your overall HP reaches zero then you will obviously die, but having your head or thorax HP reach zero also results in instant death.
You will additionally have to deal with light bleeds, heavy bleeds, and fractures. These all require different healing items to deal with, and can dramatically alter your health if left untreated.
You also need to make sure that you're kept hydrated and well fed, as becoming dehydrated and without energy can also leave you in a tough spot. Drinking or eating food and drink that you find in each raid is always a good idea, so keep your eyes peeled and keep in mind some dedicated food spawns.
Moving onto actual combat tips, you will generally want to avoid full-auto and burst fire when using a lot of the early-game weapons. Tarkov has some of the most dramatic recoil you will likely encounter in a game, so having most of your mag dumped into the sky is less than ideal.
Furthermore, when you reload your gun you are only reloading into the magazines in your tactical rig. If you were to use half of a mag and then reload it, the unused ammo will remain within that magazine until you were to unpack it or reinsert that same magazine.
Our final combat tip is one that is perhaps slightly more advanced than beginner level but will help you massively if you manage to implement it into your playstyle. If you're in a fight or think that an enemy is near, always try to peek from the right-hand side of cover - commonly referred to as the right-side peeker's advantage.
As your vision is predominantly through your right eye in Escape From Tarkov, you show your body far less when you peek from your right-hand side than if you were to look from the left. While this might not seem like a big deal, it can very easily be the difference between life and death, and can often obscure you entirely from your opponents view.
As a closing note, we have a plethora of in-depth Escape From Tarkov guides here on GGRecon for you to look over, which cover far more than we are able to squeeze within this guide. This ranges from individual quest guides, to more specific concepts and items too.
Here's a couple that should help you a lot if you wish to read further beyond this Escape From Tarkov beginner's guide:
While they should help you out best in the early stages alongside this Escape From Tarkov beginner's guide, there is plenty more to learn about in the complex world of Tarkov. In the meantime though, why not have a read of this Escape From Tarkov hideout items guide to see what loot you should be saving in your raids.

About The Author
Harry Boulton
Harry is a Guides Writer at GGRecon, having completed a Masters of Research degree in Film Studies. Previously a freelance writer for PCGamesN, The Loadout, and Red Bull Gaming, he loves playing a wide variety of games from the Souls series to JRPGs, Counter-Strike, and EA FC. When not playing or writing about games and hardware, you're likely to find him watching football or listening to Madonna and Kate Bush.
This is part of the ‘Escape From Tarkov’ directory
Directory contents
-
Anesthesia
-
Beyond the Red Meat Part 1
-
BP Depot
-
Burning Rubber
-
Checking
-
Chemical Part 1
-
Classified Technologies
-
Corporate Secrets
-
Delivery from the Past
-
Drug Trafficking
-
Energy Crisis
-
The Extortionist
-
First in Line
-
Grenadier
-
Gunsmith Part 2
-
Gunsmith Part 3
-
Gunsmith Part 9
-
Gunsmith Special Order
-
Hot Delivery
-
Introduction
-
Letters
-
Luxurious Life
-
Out of Curiosity
-
Pharmacist
-
Rough Tarkov
-
Saving the Mole
-
Search Mission
-
Seaside Vacation
-
Shooting Cans
-
Shortage
-
Stray Dogs
-
The Walls Have Eyes
-
What's on the Flash Drive
-
Exit Here
