Escape from Tarkov: Shooting Cans quest walkthrough
Shooting Cans is the first quest most players will look to complete in Escape from Tarkov, so follow this walkthrough if you're struggling to find the weapons.
This is part of the ‘Escape From Tarkov’ directory
Directory contents
-
Anesthesia
-
Beyond the Red Meat Part 1
-
BP Depot
-
Burning Rubber
-
Checking
-
Chemical Part 1
-
Classified Technologies
-
Corporate Secrets
-
Delivery from the Past
-
Drug Trafficking
-
Energy Crisis
-
The Extortionist
-
First in Line
-
Grenadier
-
Gunsmith Part 2
-
Gunsmith Part 3
-
Gunsmith Part 9
-
Gunsmith Special Order
-
Hot Delivery
-
Introduction
-
Letters
-
Luxurious Life
-
Out of Curiosity
-
Pharmacist
-
Rough Tarkov
-
Saving the Mole
-
Search Mission
-
Seaside Vacation
-
Shooting Cans
-
Shortage
-
Stray Dogs
-
The Walls Have Eyes
-
What's on the Flash Drive
-
Exit Here
At the start of a new wipe in Escape from Tarkov, it's likely that the Shooting Cans quest from Prapor will be the first thing on your task list. Follow our complete walkthrough below to find the two machine guns and get this quest completed!
How to complete Shooting Cans
In order to complete Shooting Cans you'll need to find the Utyos machine gun and AGS grenade launcher on Ground Zero, alongside eliminating any 5 targets on the same map (Scav and PMC).
Thankfully unlike most 'find and locate' quests you don't need to survive and extract from the raid in order for the subtask to count, so you can simply walk up to either weapon and it'll permanently keep your progress.
Utyos machine gun location
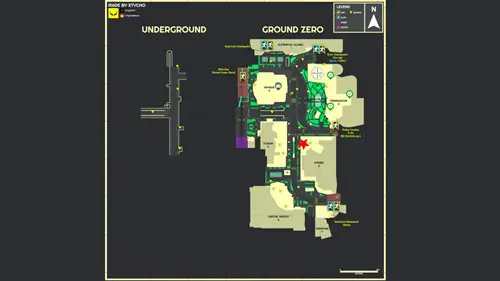
You'll find the Utyos machine gun on the fifth floor of the Empire building, which is between Terragroup and Nakatani and opposite Fusion in the centre of the map.
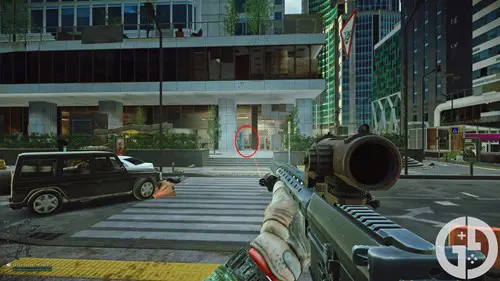
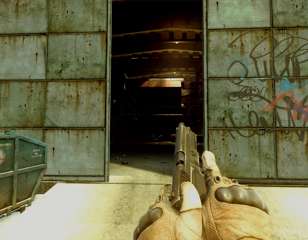
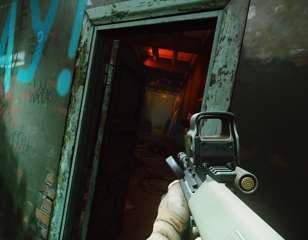
Heading into the building on the ground floor you'll want to go into the corridor behind the Tarbank wall and take the door on the left in the picture below in order to head up the stairs.
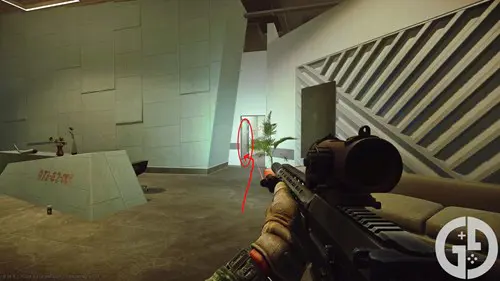
Make sure that you don't go in the room at the end of the corridor past the red writing on the wall, as there's a claymore mine inside that'll insta-kill you!
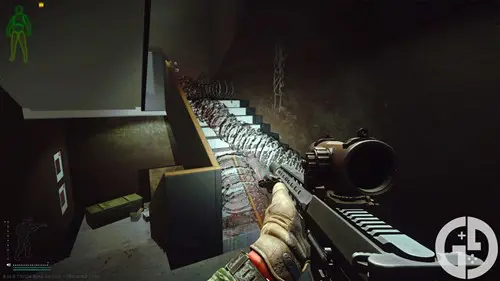
Continue up the stairs past the barbed wire (either jump through or sprint past in order to minimise damage and noise), and then head out the door at the top.
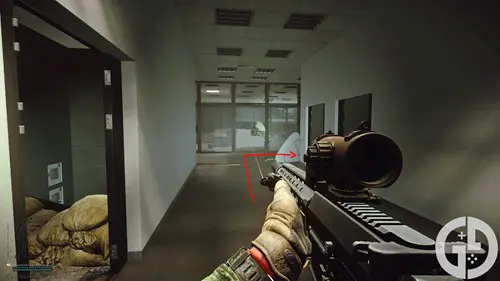
Once you're through the door you'll want to head left and then right, and you should be able to see the machine gun on a pallet by the window.
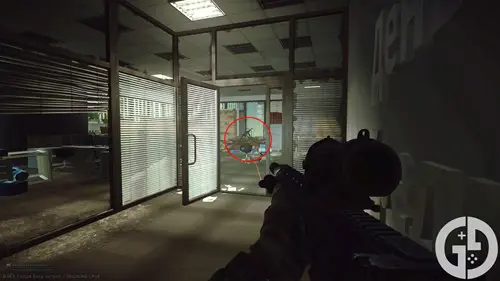
All you need to do now is walk up to the machine gun, wait for the subtask to trigger and you're good to go!
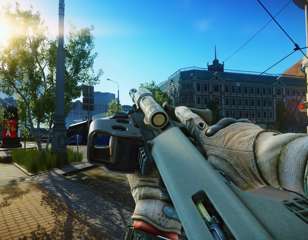
This is also a great spot to potentially get a couple of the eliminations for the quest too, as you're able to see out onto the street and into other buildings. Be wary though as this is a targeted spot - especially at the start of the wipe - so don't stay too long.
AGS grenade launcher location
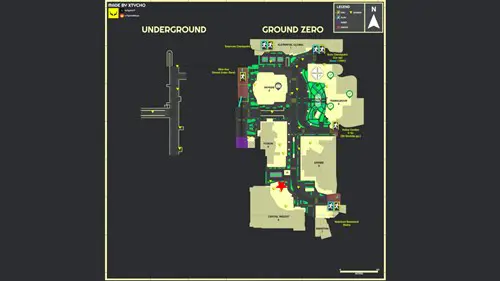
You'll find the AGS grenade launcher on the third floor of the Capital Insight building, which is next to Nakatani and across the road from Empire where you found the Utyos machine gun.
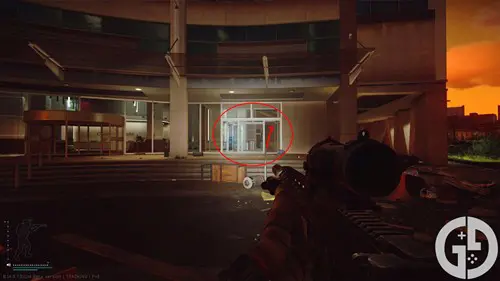
You'll want to head through the main door on the right-hand side, head up the metal escalator, and then finally up the stairs to the right once you reach the top.
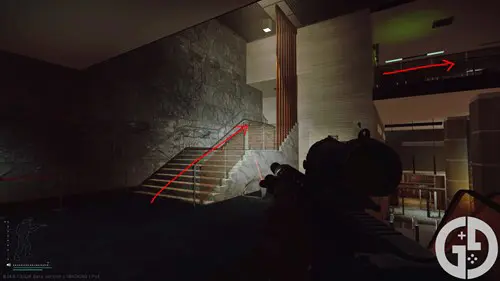
There should then be a double door at the top of these stairs. Head through and continue down the corridor until you reach the second door on the left, across from the food stand.
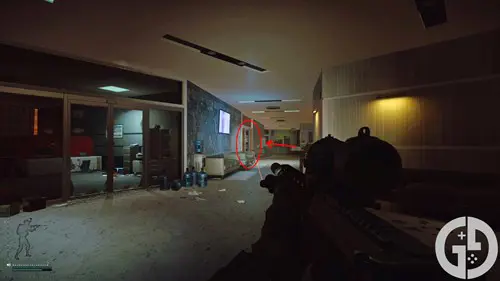
Head into that room, and the AGS grenade launcher should be there at the back on a pallet.
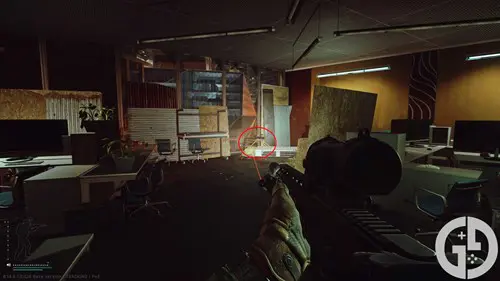
Much like the machine gun you only need to get close enough in order for the subtask to complete, and you can use the window to peek down onto the street in search of some lucky kills.
Extracting via Nakatani Basement Stairs
If you're fortunate enough to have the Nakatani Basement extraction then you'll be able to swiftly leave the raid. Just head back out of the Capital Insight building and turn right, heading down to the end of the street.
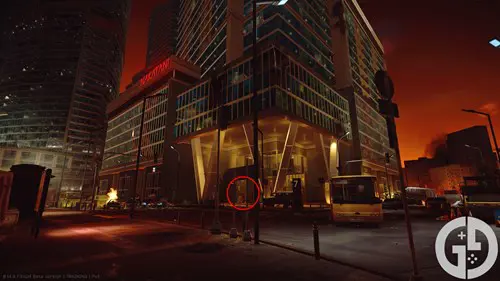
The building situated at the end here is the Nakatani building - and you should also be able to handily see its name emblazoned on the side of its structure.
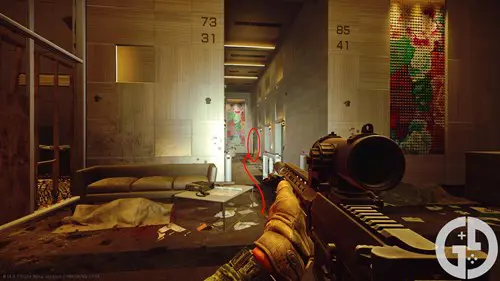
Head inside through the barbed wire entrance and turn left. There should be a door at the end of the corridor, leading to some stairs down. Continue down the stairs and the extract should trigger. Be warned though, as players have a tendency to camp here, especially at the start of a wipe - so always stay on your guard.
Extracting via Emercom Checkpoint
If you spawned on the Nakatani side of the map, however, you'll likely need to head to the Emercom Checkpoint extraction. As this is on the other side of the map to Capital Insight and Empire, your best bet for safety is to head down into the underground section via one of the buildings or tunnels.
There are still Scavs and potentially other PMCs down here, but you're thankfully not left exposed to players peeking from the many windows inside the towering buildings. Head down the underground passage until you reach the other end, and then make your way back up to the street.
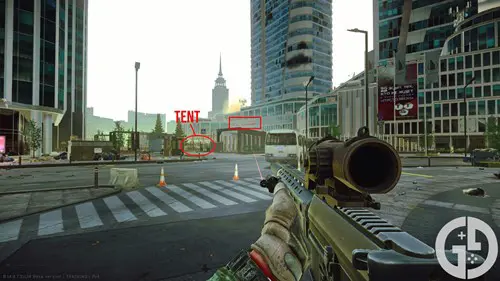
You'll want to be looking for the Unity Credit Bank building, which is by a tent and a bunch of medical supplies. Head to the doors behind the tent and the extract should trigger.
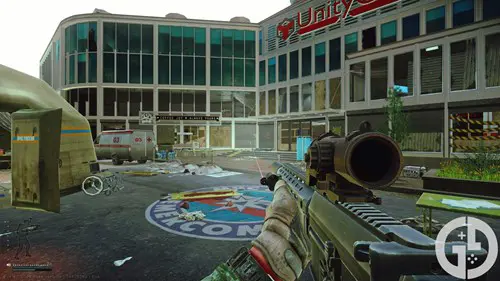
You are quite exposed here too, so try not to stand still to leave yourself a sitting duck.
How to eliminate 5 targets
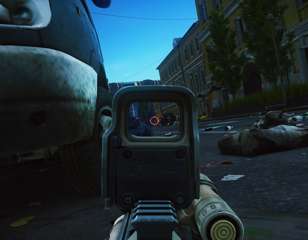
Telling you how to eliminate targets isn't exactly straightforward, as it relies on your general skill within what is admittedly a very complex game. You should likely come across at least 5 Scavs (AI enemies) as you work your way to the mounted weapons and the extract, but taking them down effectively can be tricky for new players.
Make sure to take your time, don't rush into anything, and listen out for any noises that can help you identify targets before they spot you. Scavs usually call out when they spot you, and don't start shooting for at least a couple of seconds, letting you get the drop on them first.
Additionally, most Scavs are relatively unarmoured - especially when it comes to helmets - so try and aim for the head as one shot with almost every round in the game should kill them without any head armour.
PMCs - otherwise known as other players - are a whole other story though, as your encounters with them will likely vary significantly. As a new player, I'd recommend avoiding engagements and aggressive tactics as the likelihood is that your opponent will be more equipped than you to deal with a fight.
However, as Ground Zero has a level 20 cap, it's unlikely that their gear will be significant enough to completely rule out your chances.
Make sure to check out our extensive beginner's guide if you are struggling as a new player though, as there are likely plenty of systems that you haven't even thought of encountering that might help you on your way to success here.

About The Author
Harry Boulton
Harry is a Guides Writer at GGRecon, having completed a Masters of Research degree in Film Studies. Previously a freelance writer for PCGamesN, The Loadout, and Red Bull Gaming, he loves playing a wide variety of games from the Souls series to JRPGs, Counter-Strike, and EA FC. When not playing or writing about games and hardware, you're likely to find him watching football or listening to Madonna and Kate Bush.
This is part of the ‘Escape From Tarkov’ directory
Directory contents
-
Anesthesia
-
Beyond the Red Meat Part 1
-
BP Depot
-
Burning Rubber
-
Checking
-
Chemical Part 1
-
Classified Technologies
-
Corporate Secrets
-
Delivery from the Past
-
Drug Trafficking
-
Energy Crisis
-
The Extortionist
-
First in Line
-
Grenadier
-
Gunsmith Part 2
-
Gunsmith Part 3
-
Gunsmith Part 9
-
Gunsmith Special Order
-
Hot Delivery
-
Introduction
-
Letters
-
Luxurious Life
-
Out of Curiosity
-
Pharmacist
-
Rough Tarkov
-
Saving the Mole
-
Search Mission
-
Seaside Vacation
-
Shooting Cans
-
Shortage
-
Stray Dogs
-
The Walls Have Eyes
-
What's on the Flash Drive
-
Exit Here

