How to find all the secret photo ops in Spider-Man Remastered
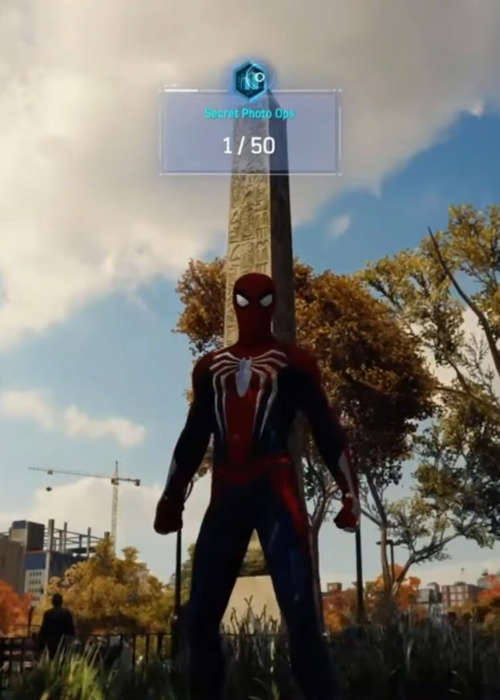
The secret photo ops in Spider-Man are easily the hardest collectables to track down in the game, but we have the locations mapped out for you.
Spider-Man secret photo ops are maybe the trickiest part of the game to complete. Spider-Man features plenty of side activities and collectables to track down. Most are clearly sign-posted and can be tracked on the map. The only activity that is not so simple is the Spider-Man secret photo ops.
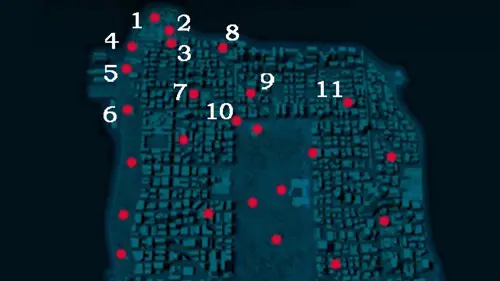
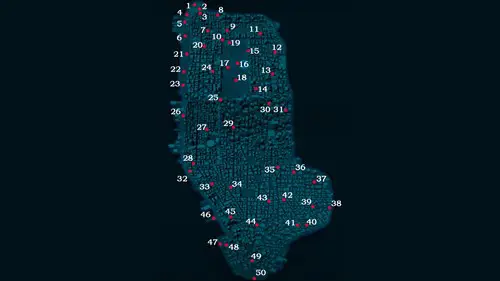
For the purposes of this guide, we are going to start from the top of the map and work our way down. Photo number one in Harlem is right up the top of the map, as you need to take a picture of Uncle Ben's grave in the cemetery. From there, go south and snap a picture of the nearby church. Just opposite the front doors of the church, there are some buildings with graffiti art on the walls. Climb up there and take a picture of the wall with three pyramids with eyes in them.
Next up, head west from here to another section of the graveyard. You will find a short tower-like monument, grab a picture of that. Then, head south along the water. Just after you pass a bridge, take a picture of the graffiti on the wall facing the docks. Continue south to the Roman-style building with large columns and eagle statues for your next photo target.
Now, travel directly east. Just south of the Harlem projects you will find the gate to Harlem Sanitarium, which is your next photo op. Then head northeast, and just to the west of the centre bridge you will find the Pale Horse Ridez bike shop, grab a picture. From there, follow the main road going southeast, and on your right, you will encounter Norman Osborn's campaign office. Grab yourself a picture of the front door.
Take a quick trip southwest to the roundabout at the northwest corner of Central Park and take a picture of the statue there. Finally, head east to the other side of Harlem. Just past the parks, there is a row of apartment buildings, and in between them is a paved area with a row of trees down the middle. At the eastern end is a greenhouse, snap it for your final Harlem photo op.
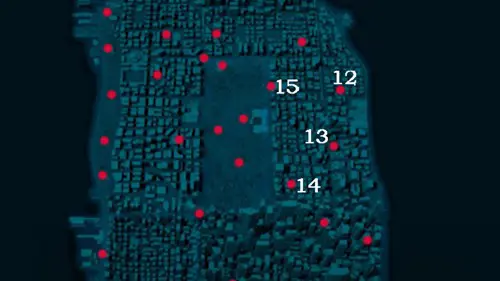
Moving on to the Upper East Side, the first photo we're going for is the Black Wing Tavern. Coming from Harlem, find the train bridge at the eastern end of the area, and follow it south. The bridge becomes a tunnel, but just at the point where it begins to slope down, take the street to the east. You will see some trees on the right side, that is the Black Wing Tavern. Take a picture of the sign out front. After that, go back to the large street where the train bridge was and continue south. Just as you pass the Avengers building, look left and you will see two statues on top of balls. Just beyond those statues is a fountain, you need to take a picture of that.
Continue south down the main street until you see a park on your left, to the east. You need to go west, on the street just before the park. About halfway down this street on the left, you will see a library with large banners that say Greek Myths on them. Take a picture of the front of the library. To cap off the Upper East Side, go out to the street along the east side of Central Park and follow it north. On your right, near the end of the park, you will see the Latin American Museum. Take a picture.
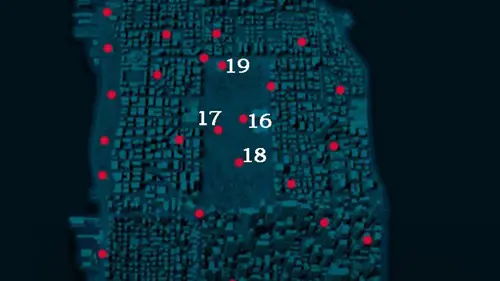
Now, we're heading into the park itself. Go to the museum in the park, that is the large building on the east side. From there, look to the west and you will see a large stone monument. Head over there and grab a picture. Continue to the west and you will find a castle, snap that up for your second Park pic.
Now head south, and close to the center of the park, you will find a pond with some small boats moored beside a shack. Take a picture of the shack. To finish off here, head to the northwest corner of Central Park. Here you will find a small bunker on a hill with an American flag, grab a picture and we are finished here.
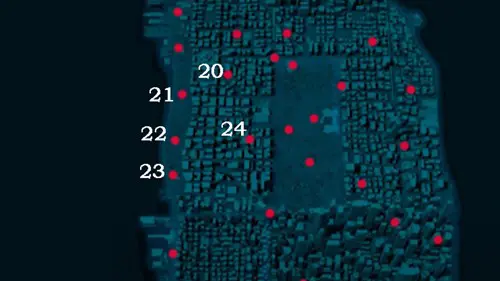
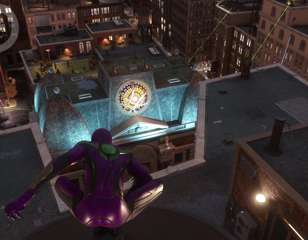
Starting at the top of the Upper West Side, an Oscorp building can be found here, right in the center at the top edge of the area. Head there and take a picture of the front entrance of the building. From there, go west to the stretch of park along the river. North of you will be the ornate building we photographed back in Harlem, well directly south of that is a much smaller building with a green pointed roof. Take a picture of that one.
Follow the grassy area south and you will find a statue of some eagles attacking a goat, that is the subject of your next picture. Go just a little further south and you will see a large monument, like a tower surrounded by pillars. Grab a picture of it. Now head back east into the city, and go slightly north. About a block away from Central Park, around the midpoint of the Upper East Side, you should find Firehouse 74, and the fire truck outside of it. Take a picture here to complete the area.
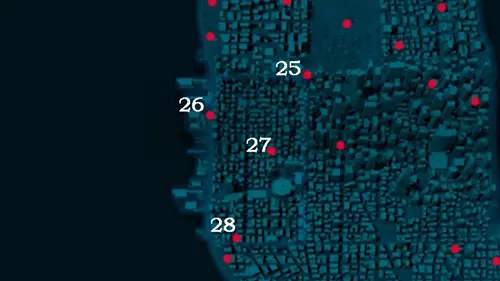
Time to go pay Daredevil a visit! We're off to Hell's Kitchen. The first photo here is pretty simple, it is at the southwest corner of Central Park. Take a picture of the monument there at the center of the roundabout. Then, head out to the riverbank on the west side. Follow the road south, until you see the large Portside Grain building facing the water. There will be a massive painting of a skull with crossed swords there, take a picture of that.
Our next port of call is the law office of Nelson and Murdock, which isn't much of a landmark and can be difficult to find. Here are some directions from a bigger landmark to help you find it. First, start from Madison Square Garden, which is the large circular building in the east of Hell's Kitchen. From there, take the street going north. Take the second left turn, and then the first immediate right turn. You will know you are in the right place if you see Josie's bar to your right. Go up this short street, and you will find Nelson and Murdock's on the corner on the left.
The last picture in Hell's Kitchen is a large mural of the Vulture. Find the elevated walkway in the southwest of the area, and follow it south. Just before the border with Greenwich, you will see the painting to the east.
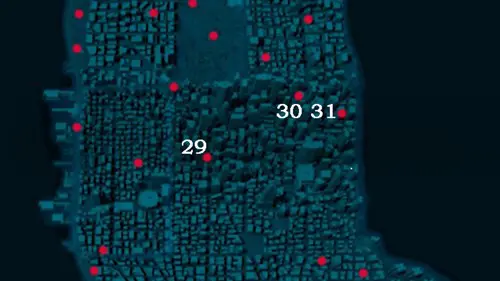
Into Midtown next, and our first stop is Times Square. In the southern part of Times Square, there is a building with a green tower roof on it on the west side. Take a photo of this tower-like section.
Our next photo subject is a tree. To find it, head to the cathedral in the northwest part of Midtown. Go to the eastern end of the cathedral, then head north. Climb over the shorter building, then go to the right to see the singular tree between some concave buildings.
Go east out to the water, then head south. Your next picture is of some pictures of Koi fish painted on the side of a building. Swing south along the riverside, but watch the buildings as you go. You should spot the Koi paintings a couple of blocks south of the bridge.
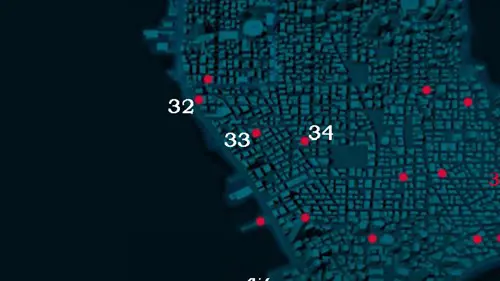
Next up is Greenwich, and we are starting in the extreme northwest corner of the region. Head there, and find the Modern Art museum facing the river. Grab a picture of the front of the building. Then head south to Octavius' Lab. On the roof of the lab, go east and pass over the walking bridge. Check the east wall of the next building over, where you should find an LGBTQ rainbow pattern painted.
Continue east from where we started at Ocatvius' Lab, to a crossroads. Go to the opposite side, and you will find a large painting of J. Jonah Jameson as a baby on the eastern side of the building. Snap that to finish off Greenwich.
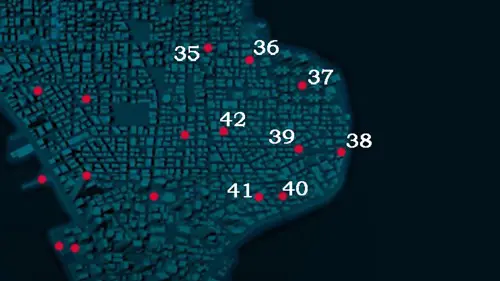
It must be Friday, because we're headed to Chinatown next. Go straight to the northwest corner of the region. Here you will find a huge building that splits into four towering structures in each corner, with a raised garden in the middle. Take a picture of the statue in the middle of the garden. Next, we need to head east, to the area just before the cross-shaped apartment buildings. One block west of the most northern of these apartment blocks is a huge movie poster on the corner of a building. It is mostly orange, and the film is called First and Last Day. Grab a picture of that.
Then, head into the area with the cross-shaped buildings to the east. You'll notice on your map there is a large open area in the middle of these buildings, where there is a small park. Take a picture of the water feature in the middle of this area. Then head south, to the end of the bridge on the east side of Chinatown. Underneath the bridge, just before the river, you will find a skatepark to take a picture of.
Now, get onto the bridge and follow it west into the city. At the end of the bridge is a large archway, take a picture of that. Then head southwest to the only secret photo op that is marked on your map, the police station. Take a picture of the front entrance of the police station marked on your map in the south of the region.
From the northwest corner of the Chinatown police station, look northwest and you will see the entrance to an alleyway. Go down that alley and take the first right turn. On your immediate right will be a painting of Rhino, so take a picture of him.
For the last photo in Chinatown, we need to get back onto the long diagonal street that the police station is at the south end of. Head to the north end of the street, where it changes from diagonal to straight north. Go southeast one block, and take the road to the west. There on the corner, you will see Leo's Italian restaurant. Take a picture of Leo's to cap off Chinatown.
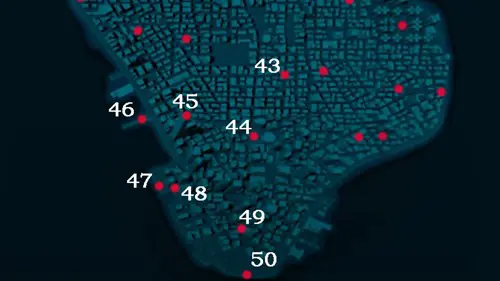
Now on to the final district of Manhattan, the Financial District. We'll start in the northeast corner of the area. Just as you enter the Financial District here, there is an old red brick building with a roof styled like a castle. Halfway down the building on each corner, there are statues. Take a picture of one of the statues to continue.
Next, head southwest into the district proper, and to the open area east of the police station. In the middle of this area, you will find a statue in a water feature, take a picture of the statue. Then head west toward the One World Trade Center, which is a very large building that appears to be made entirely of glass, then head north. From the Trade Center, go north one block and look to the east, you should see the sign of the Auerbach Theater there. Take a picture of the front of the theatre.
From the theatre, head west to the waterfront. On the long pier there you will see some tennis courts, snag a picture of them. Follow the shoreline south until you find a metal art structure that looks like a bendy tower. Snap that, then go immediately east around the next corner to find some windows at ground level that are covered in floral designs. Take a picture of those too
Next up is the dog statue that used to be a bull, so head to the southern part of the Financial District. The statue can be found if you head to the most southern buildings in the city, then head a bit north. Just past these buildings is a corner section with a bunch of trees, and at the tip of this corner is the dog statue of which you need to take a photo.
For a finish, simply head to the southern tip of the map, and take a picture of the Statue of Liberty. That completes the secret photo ops collection and gets you the BSU Spidey costume.
- For tips on another photography challenge, check out our Spider-Man Black Cat Stakeouts guide.
As with all side activities in Spider-Man, you will need to play through the early goings of the game before you will be able to start working on side content. It is advisable to play through a decent chunk of the game, at least the first few hours, before branching out into other content. That way, you can save yourself some time and complete side activities area by area.
Before any of that, you should repair all of the surveillance towers. These are marked on your map from very early on, and repairing them unlocks the map properly. Once you have done that, and made enough main story progress that you can see all the side content on the map (before unlocking them, they will appear as question marks), you are ready to tackle all the extra jobs.
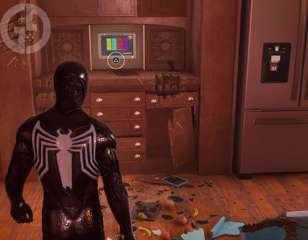
Also, be sure to equip the Proximity Sensor suit mod. This mod will not make the photo locations appear on the main map, but it will make them appear on your mini-map as you swing around the city and pass them by. It is extremely useful, so be sure to grab it before tackling this challenge.
Those are all the locations of the Spider-Man Secret Photo Ops challenge. For more tips on the game, check out our Spider-Man Backpacks guide.

About The Author
Dave McAdam
Dave is a Senior Guides Writer at GGRecon, after several years of freelancing across the industry. He covers a wide range of games, with particular focus on shooters like Destiny 2, RPGs like Baldur's Gate 3 and Cyberpunk 2077, and fighting games like Street Fighter 6 and Tekken 8.

