All Can locations in Stellar Blade & rewards for collecting them
Here you'll read to find out where you can collect every single available Can in Stellar Blade as well as the rewards you'll get for doing so in the game.
Highlights
- There are 49 Cans to collect in every region of Stellar Blade, including Eidos 7, Wasteland, and Spire 4
- Collecting all Cans will reward a trophy and a Nano Suit for EVE
As you explore the world of Stellar Blade, you’ll undoubtedly come across an assortment of Cans to collect – and I’m here to break down all the ones I’ve found so far so that you can grab them for yourself.
There are plenty of large regions to traverse, and collecting all 49 Cans that litter the environment can net you some of the best rewards the game has to offer - including a shiny new Nano Suit to go toward getting all the outfits Stellar Blade has to offer.
All Can locations in Stellar Blade
Eidos 7
Certain areas in Stellar Blade don’t have maps, and Eidos 7 is one of them. However, there are only three Cans to collect in this area:
|
Can |
Location |
|
Potential Blast |
In the construction zone at the top of the building where you’ll find one of the Crane ID key cards |
|
Elixir Carrot |
After lowering the water in the Flooded Commercial Sector, follow the main path down to the building with a beer barrel sign |
|
Cryo Original |
After lowering the water in the Flooded Commercial Sector, follow the main path until you come to a Liquor store just before Warehouse 77. There is a Fiz machine nearby with the Can inside |
Xion
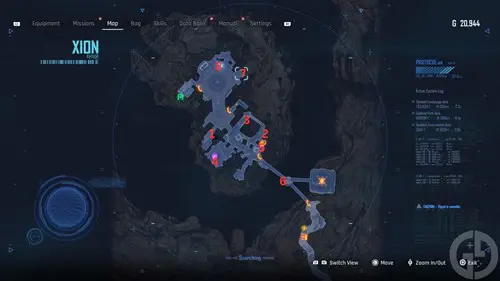
There are eight Cans to collect in Xion. I’d advise grabbing these before the first point of no return after the Abyss Levoire section. Don’t worry, this point will be telegraphed before you proceed so you’ll have time to go back and grab the Cans you missed.
|
Can |
Location |
Map Number |
|
Behemoth Red |
Fiz machine in the alley of the main plaza on the way to Enya and the ‘Looking at You’ mission |
1 |
|
Dionysus C |
In an alley below the Bulletin Board |
2 |
|
The Manchinetta Americana |
At the top of the steps leading to the Bulletin Board and Roxanne’s store |
3 |
|
Mountain Sparkle Mont Blanc |
Fiz machine behind Sister’s Junk store |
4 |
|
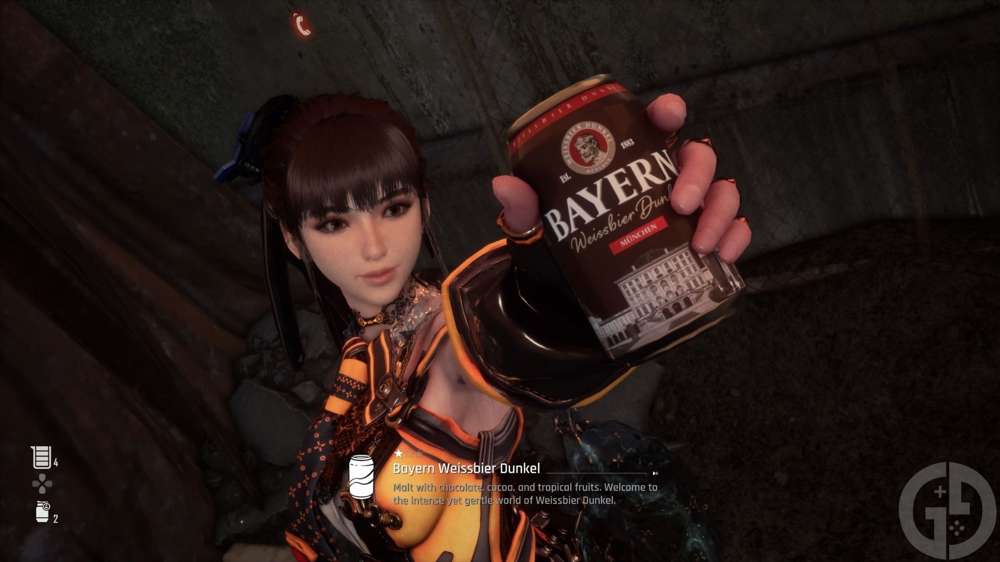
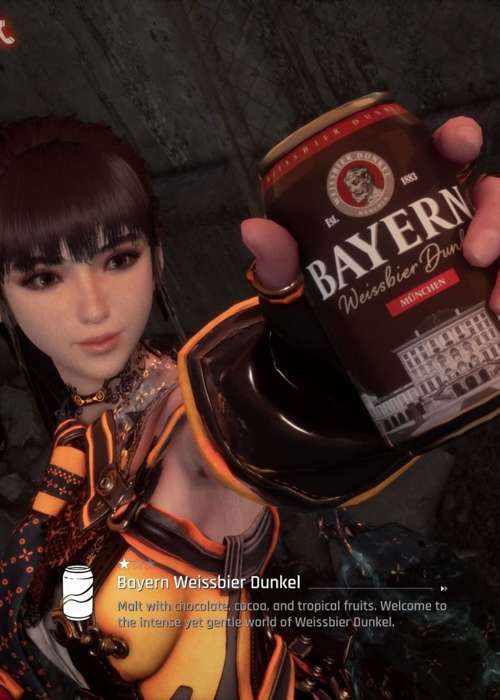
Bayern Weissbier Dunkel |
The path near the steps toward the Bulletin Board. Near the copy of Plastic Hearts Vol. 5 |
5 |
|
GrainT Oolong |
At the crossroads between the Safehouse and Wasteland path. You’ll need to climb down a rope and ladder, past a Supply Crate, which will be on a cliff ledge |
6 |
|
The Machinetta Caramel Macchiato |
Fiz machine in the corner of the main plaza in the north of Xion |
7 |
|
Pixie |
On the ground in the upper main plaza just in front of the alley behind Memory Alley |
8 |
Wasteland
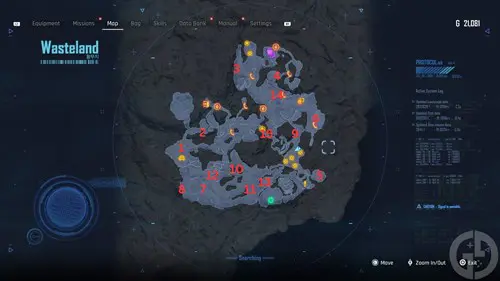
There are 15 Cans in the Wasteland area. As this is one of the largest areas in the game with plenty of cliffs and landmarks, I’ve marked each Can area in red so you know the areas to head to.
|
Can |
Location |
Map Number |
|
Potential Tempest |
In a chest near the Solar Tower. There are three terminals in the vicinity that you’ll need to activate to unlock the chest |
1 |
|
The Haven Green Tea |
From the Solar Tower, you’ll notice branches below you from the cliff. Fall onto these branches and swing along until you reach the Can |
2 |
|
Corsair Larger |
In a crate in the north of the Wasteland on a raised platform. To get this, you’ll need to activate the switch at the long hill ahead. This will temporarily lower the platform and you’ll have to dodge turrets and Naytibas to reach it before the platform raises again |
3 |
|
Bayern Hefe Weissbier |
Fiz machine around from the Scrap Yard in the Central Scrap Plains |
4 |
|
The Machinetta Caffe Latte |
In a crate in the Plant area of the Wasteland. To get the Can, you’ll need to move three trolleys onto some pressure pads to release the crane holding it |
5 |
|
Cryo The Clear |
Behind a gate in the sinkhole leading to the Forbidden Area. Use the ropes and rocky paths to descend until you see an iron gate. Open it and collect the Can inside |
6 |
|
Behemoth Green |
Just above the Western Great Canyon Camp. You’ll need to move two ball objects onto the pressure plates near the crate to unlock it |
7 |
|
Cryo Café Original |
Behind the dilapidated ship in the Great Canyon area |
8 |
|
Pixie Zero |
At the Junkyard, there is a trapped service bot under a broken bridge. Destroy the beams that are keeping it in place with your ranged attacks. It will then grab a Can for you as a reward for freeing it |
9 |
|
Cryo Zero |
Open a crate near the Central Great Canyon camp and a drone with a target will fly out. Shoot the target and it will move to another location. After doing this three times, the drone will drop the Can |
10 |
|
Nectar Orange |
From the Great Central Canyon camp, you’ll see a billboard that reads “Bottom”. There is a crate on top with the Can inside. It can only be reached by pushing the nearby movable crate closer to the sign and using the Double Jump ability you eventually unlock |
11 |
|
Mountain Sparkle Halla |
In the Great Western Canyon area, you’ll notice some ledges that can only be accessed by double jumping. Use these ledges and follow the path of poles you can swing from along the edges of the canyon. After reaching the final part of the jump, defeat the nearby Naytibas, grab the Beta upgrade from the body nearby and open the crate they’re guarding to collect the Can |
12 |
|
GrainT Barley |
From Altess Levoire, you need to unlock the large gate and follow the path, including swinging across gaps until you get to a large area with weights. You’ll see the numbers 23 and 3 above you. There are trolleys you need to move onto the pressure plates in the area until the meters by them read the respective numbers. This will then give you access to the Can |
13 |
|
Elixir Green |
On some scaffolding on the northern path leading from the Scrap Yard. Double jump from the nearby ramp to reach it |
14 |
|
GrainT Corn |
Fiz Machine in the centre of the Wasteland |
15 |
Matrix 11
There are only three cans in Matrix 11 and they are quite easy to spot as you progress through the area. While there’s no map, the area is relatively linear, so as long as you’re diligent in looking around, you’ll likely find them all.
|
Can |
Location |
|
Cryo Café Vanilla |
In the Railyard, after defeating the Stalker boss, move the railcar so that it points in the other direction. There is a robot nearby that can be destroyed as well |
|
Newfoundland Dry |
In the Sewers. After defeating the Juggernaut boss, jump on the corrugated boxes until you reach the Can and a crate at the back of the room |
|
Corsair Ale |
In the waterlogged Train Graveyard, swim under the fence at the end of the flooded corridor. It’s near a Drone Module Upgrade and Body Core |
Great Desert
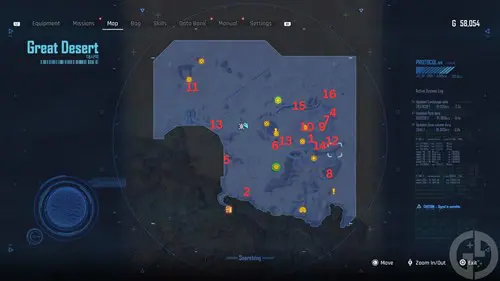
There are a whopping 16 Cans to collect in Stellar Blade’s Great Desert. While the area is large, it’s very open and the Cans can be relatively simple to find, especially with a handy marked map like the one above.
| Can | Location | Map Number |
| Potential Frost | From the West of Buried Ruins camp, head north until you come across a bus by a building with yellow paint on the wall. Climb the ladder to the top of the building and jump across the rooftops until you reach a movable box. Move the box to the see-saw and wedge it under the right-hand side to make a ramp. Use the ramp to reach a vaulting pole to the last building. Some lasers are blocking the entrance to the can, so carefully jump through them, open the crate and collect it | 1 |
| Newfoundland Dry Zero | Near the entrance to the Great Desert in the south of the map. Start to head west until you see some grass in the sand. There is a crate poking out that can be destroyed. After shooting or slashing it, collect the Can | 2 |
| Milky Pop Zero | In the Western portion of the map where there is a corner, shoot the drone in the air to have it drop a rope. Follow the ledges and vaulting poles along the canyon wall to climb the rope and open the nearby crate | 3 |
| Behemoth Black | In the eat of the map, you'll come across an area with three movable boxes and numbered pressure plates. Move the boxes onto the numbers 12, 2, and 13 as indicated by the nearby sign. Doing so will unlock the nearby crate with the Can inside | 4 |
| Nectar Cranberry | From the phone booth in the west of the map, head to a ledge on the side of the building nearby that can be ridden up. After reaching the top, swing from the vaulting pole onto the floating service droid platforms and follow them up the building until you reach the crate with the Can inside | 5 |
| Nectar Grape | Near Clyde and the Oasis Fishing Hut, head south until you come across a Fiz machine with the Can | 6 |
| The Haven Milk Tea | From the phone booth waypoint in the east of the map, you'll find a device with the numbers 4, 6 and 7 on a wall nearby. To get the can, you'll need to move trolleys onto the pressure plates of the surrounding units to make those numbers and turn them green. After doing so, open the gate with the two crates inside, one of them contains the Can | 7 |
| Johnson's Highball Lemon | Pull the movable box toward the ledges in the canyon. Climb up to the top and open the crate to collect the Can | 8 |
| Johnson's Highball Ginger | From the Crumbling Rooftop Supply Camp, kick the Fiz machine nearby to collect the Can | 9 |
| Cryo The Malt | In the east of the map, shoot the drone holding a target above a ruined building. Grab the rope it drops and interact with the fuse box on the roof. Doing so will start a timer. Interact with the remaining fuse boxes in time by swinging from rooftop to rooftop to unlock the gate with the crate containing the Can | 10 |
| Cryo Café Mocha | In the north-west part of the map, interact with the crate and shoot down the targets in the order they appear to unlock it | 11 |
| Liquid Nuclear | From the Crumbling Rooftop Supply Camp head south until you reach some scaffolding that leads into a dilapidated building. Jump into the adjoining ruin and onto the movable box inside. After doing so, avoid the crates with explosives inside and the surrounding Naytibas to reach the crate with the Can inside | 12 |
| Starwell | From the West of Buried Ruins camp, kill the Naytiba beneath the sand that is encircling an explosive crate. After doing so, open the crate and collect the Can | 13 |
| Mountain Sparkle Everest | From the Middle Path between Ruins Camp, move the movable box into the large open area. You'll see some lasers ahead. Use the box to block their beam and grab the Can in the crate | 14 |
| The Haven Earl Grey | From the Buried Ruins Outskirt camp, head to the top of the Hypertube and collect the Can from the crate | 15 |
| Liquid Fire | At the end of the Hypertube in the northeast of the map, interact with the crate on a rooftop to activate several drones. Shoot all the drones to unlock the crate and grab the Can | 16 |
Spire 4
The final area where you can find cans in Stellar Blade is Spire 4, which boasts only four cans. Like Matrix 11, Spire 4 is a relatively linear area, and the Cans should be somewhat easy for you to grab.
|
Can |
Location |
|
Milky Pop |
After defeating the Belial boss, head down the path from the nearby camp to spot the Can on the floor |
|
Liquid Lightning |
Behind some large boxes near the Space Logistics Centre camp following the laser section. |
|
Nectar Apple |
Behind a corpse to the right of the information booth in the Space Centre section |
|
Moonwell |
In a Fiz machine toward the end of the section. You’ll need to jump right and around to reach it |
Can collection rewards in Stellar Blade
As you collect more Cans in Stellar Blade, you’ll unlock various rewards that, for the most part, allow you to hold more consumable items like grenades and potions.
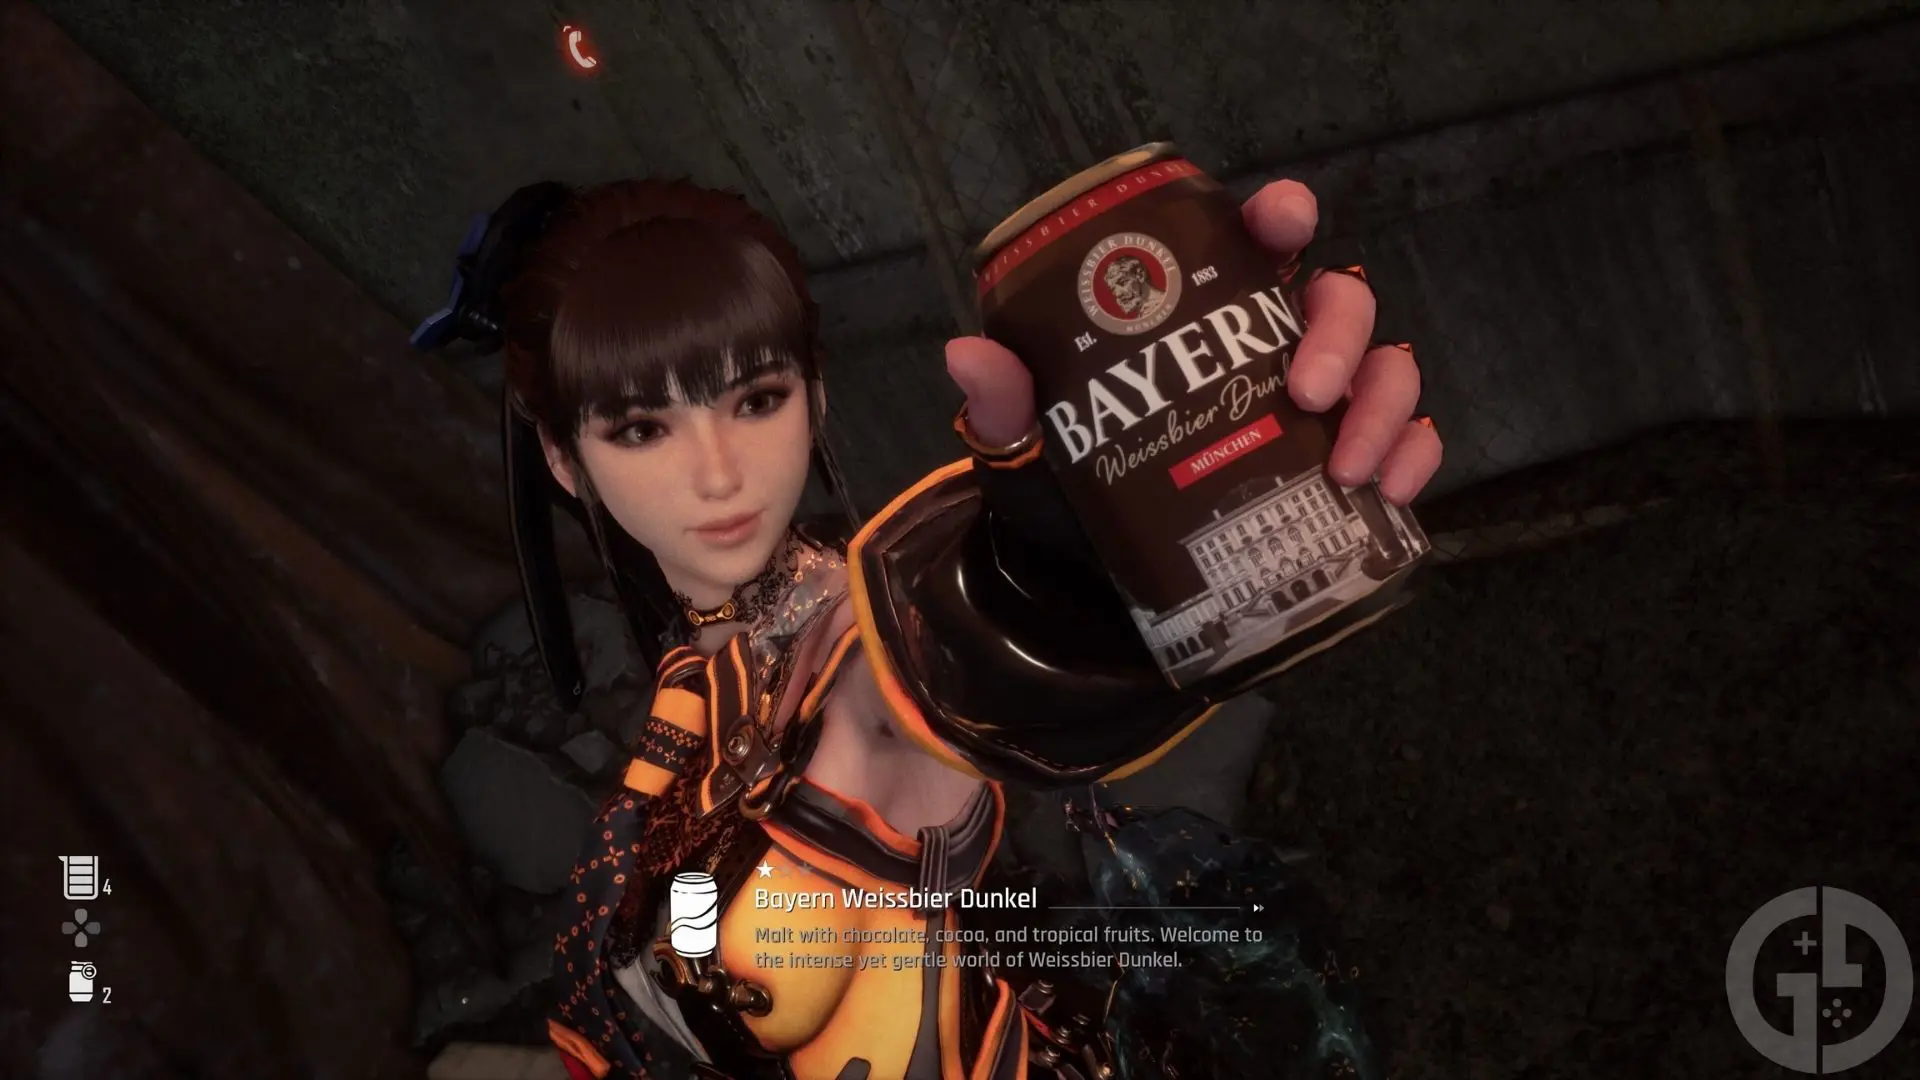
However, for collecting all the Cans in the game, you’ll also get a unique Nano Suit for EVE to wear. You'll also get your hands on one of Stellar Blade's trophies for collecting them all too.
|
Number of Cans |
Reward |
|
First Reward |
Max no. of Shock Grenades +1 |
|
7 |
Max no. of Lingering Potions +1 |
|
14 |
Max no. of Smart Mines |
|
21 |
Max no. of Highly Concentrated Potions +1 |
|
28 |
Max no. of Pulse Grenades +1 |
|
35 |
Max no. of Owned WB Pumps +1 |
|
42 |
Max no. of Sonic Grenades +1 |
|
49 |
Black Pearl Nano Suit |
That’s everything you need to collect every Can in Stellar Blade. There’s plenty more to explore in the game, so be sure to check out our Stellar Blade homepage where you’ll be able to find out how to defeat every boss and some of the best Nano Suits in the game.

About The Author
Jack Roberts
Jack is a Guides Writer at GGRecon. With a BA (Hons) & MA in English and Creative Writing, he was also the Gaming Editor for The Indiependent. When not pondering which game has the best cup of coffee (and drinking far too much of it himself), he can often be found playing Dead by Daylight, Street Fighter or making yet another build in Bloodborne.
